Quickstart a Jolene project with NetBeans
Lets build a simple working Struts project with NetBeans using Jolene. First you should look at the
quickstart guide and setup your libraries in Netbeans.
Startup NetBeans and chose File -> New Project and chose Web Application.
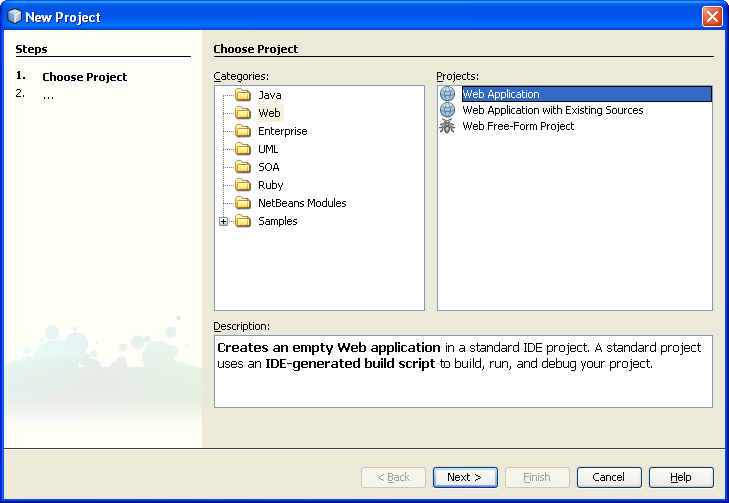
Click Next and enter your project name and location.
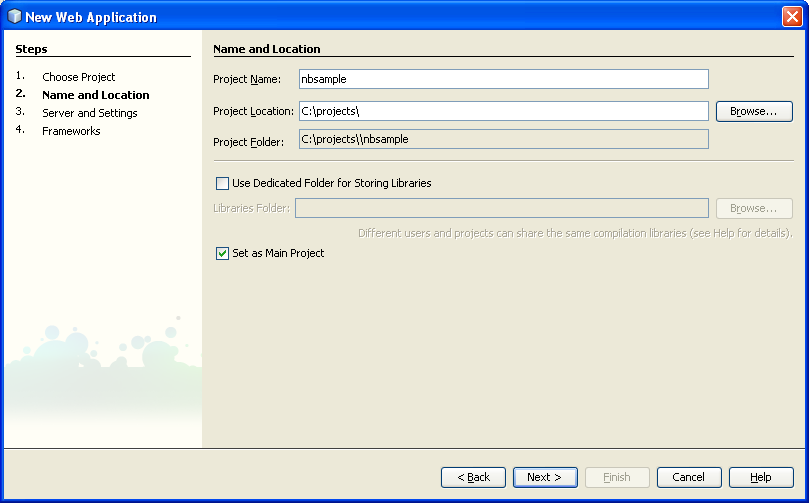
Click Next and use these defaults. Note Jolene works with GlassFish as well.
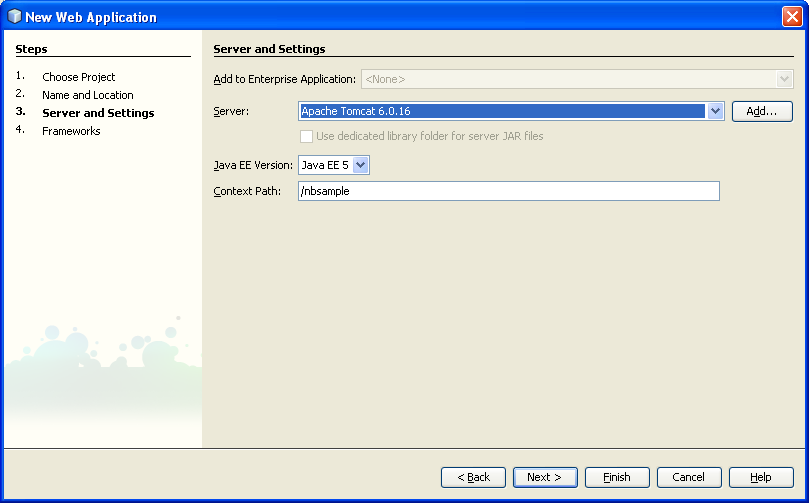
Click Next and check Struts 1.2.9. For this example you can leave the Action servlet, URL pattern, and Resource settings as the default.

Click Finish.
NetBeans creates a default project including a JSP with basic struts configurations already setup for you. You should click the run button on the toolbar to make sure the application deploys and starts properly.
The first thing we should do is configure the Jolene servlet to handle html files. The servlets job is locate the Document object either on the request or session and send it back to the user's browser. Later in the Action we'll see how to get the Document object and prepare it for the user.
Browse to the Configration Files -> web.xml then click the "Servlets" button. Your screen should look something like this:

Let's click Add Servlet Element. Enter domlet for the Servlet Name (or whatever you want), net.sf.jolene.servlet.Domlet for the Servlet Class and /pages/* for the URL patterns. Note we don't have to use this specific URL pattern but for our purposes we will be storing our html files under a /pages folder. You should only store html files here.
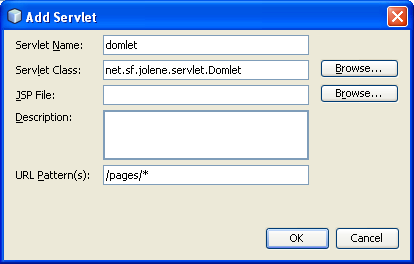
Click Ok and the chose File -> Save All from the menu.
The web.xml file should now have entries like this:
<servlet>
        <servlet-name>domlet</servlet-name>
        <servlet-class>net.sf.jolene.servlet.Domlet</servlet-class>
    </servlet>
    .....
    <servlet-mapping>
        <servlet-name>domlet</servlet-name>
        <url-pattern>/pages/*</url-pattern>
    </servlet-mapping>
Next let's create a html page. In the project treeview locate Web Pages, right-click and chose New -> Folder and enter "pages". Now click on the pages folder, right-click and chose New -> HTML. We'll call the page "hello".
Create a form and a couple of form elements. Your html can look something like this:
<html>
  <head>
    <title>Hello World</title>
    <meta http-equiv="Content-Type" content="text/html; charset=UTF-8">
  </head>
  <body>
    <form name="form1" action="test">
        <label id="mylabel">label text</label>
        <input type="text" name="hello" value="" />
    </form>
  </body>
</html>
Next we'll write a Struts action to display this page in the browser. In the project treeview locate Source Packages, expand the com.myapps.struts package, right-click and chose New -> Java Class. Enter the name HelloAction and click Finish.
HelloAction needs to inherit from Jolene's DomletAction so we'll edit the code for that and we'll add new action method to the class. While you're doing this NetBeans will import the proper packages.
At this point your code should look like this:
package com.myapp.struts;

import javax.servlet.http.HttpServletRequest;
import javax.servlet.http.HttpServletResponse;
import net.sf.jolene.struts.DomletAction;
import org.apache.struts.action.ActionForm;
import org.apache.struts.action.ActionForward;
import org.apache.struts.action.ActionMapping;

public class HelloAction extends DomletAction {

        public ActionForward helloWorld(ActionMapping mapping,
                                     ActionForm aform,
                                     HttpServletRequest request,
                                     HttpServletResponse response) {

            return mapping.findForward("success");
        }

}
Next we need to wire up this action to Struts. In the project treeview locate Configuration Files and double click on struts-config.xml. Locate the action-mappings section and we'll add a section for our HelloAction. The section in struts-config.xml should now look like this:
    <action-mappings>
        <action path="/Welcome" forward="/welcomeStruts.jsp"/>

        <action path="/helloWorld" scope="request" type="com.myapp.struts.HelloAction">
            <forward name="success" path="/pages/hello.html"/>
        </action>
    </action-mappings>
At this point we can start the application and see what we have so far. Right-click on the project at the root of the treeview and select Run. After a few moments your application should be deployed and opened with your default browser.
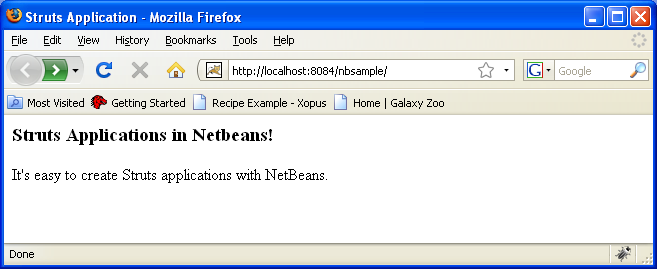
If all goes well you should see the application running in your browser:
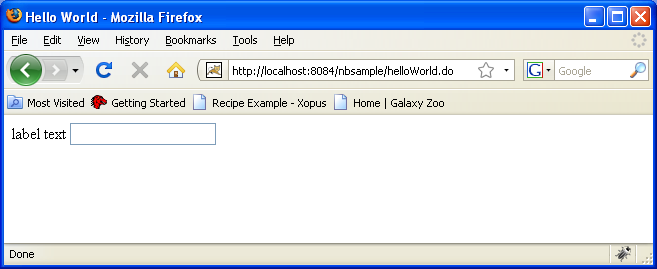
At the end of the URL add helloWorld.do to run our action and display the html page we created. Here's what it should look like so far:
Now that we have a successful run, let's have a look at logs. In the output pane in NetBeans click the Apache Tomcat 6.0.1.6 tab. If you scroll you can see some of the logs produced. Look for this line:
WARN Aug 10 08:00:37 servlet.Domlet - No document found at request or session level for url /pages/hello.html attaching a new document to the request
This is perfectly fine warning for us at this point. What this is saying is that the action we wrote does not have an associated document. Normally your action's job is to prepare the output for the user. In our case, we want to get the hello.html document and modify it in some way and then send it back to browser. Let's do that.
Go back to the HelloAction class and we'll get the document and make some changes to it. Let's start with something simple:
package com.myapp.struts;

import java.io.IOException;
import javax.servlet.http.HttpServletRequest;
import javax.servlet.http.HttpServletResponse;
import net.sf.jolene.dom.Document;
import net.sf.jolene.struts.DomletAction;
import org.apache.struts.action.ActionForm;
import org.apache.struts.action.ActionForward;
import org.apache.struts.action.ActionMapping;

public class HelloAction extends DomletAction {

        public ActionForward helloWorld(ActionMapping mapping,
                                     ActionForm aform,
                                     HttpServletRequest request,
                                     HttpServletResponse response) throws IOException {

            Document document = getDocument(mapping, "success", request);
         document.forms(0).elements("hello").setValue("HELLO!");

            return mapping.findForward("success");
        }

}
The first thing we do is get the document we want to send back to the browser. The way we do this is with the method getDocument. We pass in the ActionMapping, the forward name we want (in this case 'success' which maps to /pages/hello.html) and the request object. Then we modify the document by setting the input field 'hello' to the value 'HELLO!'.
Note also the addition of the IOException. This is because were getting the document from a file and it's possible that there could be an IOException. For our purposes we can just throw it and let the default Struts error handling mechanism deal with it.
Run the project again and let's see the result:
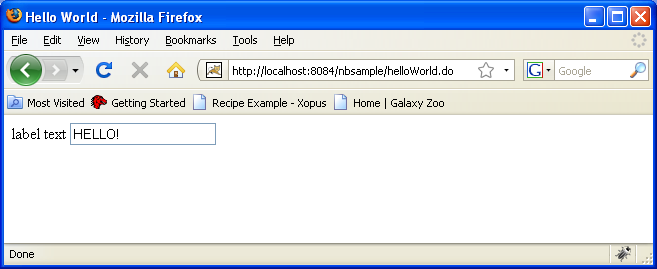
Congratulations! You have your first Jolene application working!
But we're still missing something. For this simple example it's Ok to manually set a single input value but this code would get quite tedious if we had a form with many controls on it. Fortunately, Jolene provides a solution for this. We can automatically populate a html page from a form bean. Here's how.
Let's create an Action form bean for this Action class.
Under Source Packages -> com.myapp.struts right-click and select New -> Class and enter HelloForm as the class name. This class will be a simple java bean and will need to extend the Struts ActionForm class. Let's add a couple of properties to this class to match our html page. The source should look like this:
package com.myapp.struts;

import org.apache.struts.action.ActionForm;

public class HelloForm extends ActionForm {

    private String hello;
    private String mylabel;

    public String getHello() {
        return hello;
    }

    public void setHello(String hello) {
        this.hello = hello;
    }

    public String getMylabel() {
        return mylabel;
    }

    public void setMylabel(String mylabel) {
        this.mylabel = mylabel;
    }
}
Now we'll change struts-config.xml so Struts will know about this new bean. We need to make 2 changes. Add a form-bean entry for our new form and tell our HelloAction about this form.
The changes should look like this:
    <form-beans>
        <form-bean name="HelloForm" type="com.myapp.struts.HelloForm"/>
    </form-beans>
...
    <action-mappings>
        <action path="/Welcome" forward="/welcomeStruts.jsp"/>

        <action path="/helloWorld" scope="request" type="com.myapp.struts.HelloAction" name="HelloForm">
            <forward name="success" path="/pages/hello.html"/>
        </action>
    </action-mappings>
Now let's change our HelloAction class to look like this:
package com.myapp.struts;

import java.io.IOException;
import javax.servlet.http.HttpServletRequest;
import javax.servlet.http.HttpServletResponse;
import net.sf.jolene.dom.Document;
import net.sf.jolene.struts.DomletAction;
import org.apache.struts.action.ActionForm;
import org.apache.struts.action.ActionForward;
import org.apache.struts.action.ActionMapping;

public class HelloAction extends DomletAction {

        public ActionForward helloWorld(ActionMapping mapping,
                                     ActionForm aform,
                                     HttpServletRequest request,
                                     HttpServletResponse response) throws IOException {

         HelloForm actionForm = (HelloForm)aform;

            Document document = getDocument(mapping, "success", request);
            //document.forms(0).elements("hello").setValue("HELLO!");
            document.forms(0).populate(actionForm);

            return mapping.findForward("success");
        }
}
We'll get the HelloForm from Struts and comment out the manual setting of the html input field's value and instead we'll use the form's populate method.
Let's run the project again and see what happens:

Hmm. Nothing. Is it broken? No, what we did was allow our html page to be populated by passing parameters through our form bean. Let's modify the URL to include the parameters for our 2 html objects 'mylabel' and 'hello'.

Nice. As long as we have matching form bean properties to our html form we can auto-populate our html pages.
Conclusion
This is just a simple example of what you can do with Jolene. Populating a form works with any input control, checkboxes, radios, selects etc. You can use this as a basis to experiment with different html controls.
From here you can download a zip of this project's source.
From here you can read about the Document Object Model that Jolene provides.